
Washes
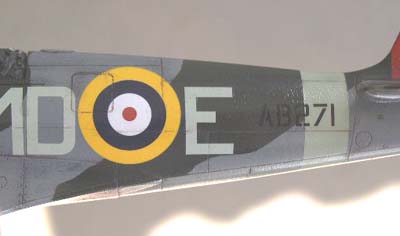
The wash is a technique used to enhance the panel lines on a model. The lines become darkened which makes them much easier to see. Now some people will point out that at 1/48 scale, the panel lines on the typical model airplane would not be very visible. However, others will point out that the idea is to create the illusion of a realistic airplane, and enhancing the panel lines does exactly that.Below: Look at this fuselage before
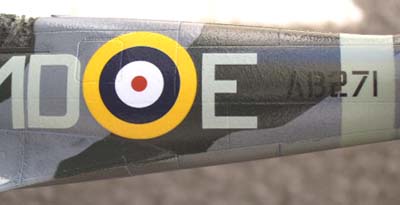
and after the wash. Note how the panel lines and access door behind the cockpit now have enhanced contrast.
The idea is to make a very thin mix of dark color (black, or dark to medium grays or browns) and apply it with a fine brush to the panel lines and surface detail.
The solution will tend to wick into recessed panel lines (this technique will not be as effective with raised panel lines). After all the detail is washed, let dry for some time, then remove the excess. The wash is then sealed in with a clear coat (probably flat clear).
You have several options for making up the wash. We like using water-based washes as they are easier to clean up. Whichever type of wash you use, make sure to seal the surface first with a gloss coat (e.g. Future acrylic). A flat coat is rough on a micro scale, and the wash gets absorbed by the surface and becomes very difficult to remove later.
Also be careful of using a wash with a thinner that was also used for the underlying paint. E.g. an enamel wash applied directly to an enamel paint surface could result in the underlying paint being damaged, as the thinner can eat through the protective clear coat and attack the paint. If in doubt, test the wash and paint compatibility on a piece of scrap plastic from the kit.
Some combinations known to work:
Acrylic paints + acrylic clear coat: chalk wash (pastel chalk dust + water + drop of dishwashing liquid)
Enamel paints + acrylic clear coat: oil wash (artist oils + turpenoid (mineral spirits))
Bare metal foil + acrylic clear coat: acrylic wash (acrylic paint + water + drop of dishwashing liquid)
The pictures below show the application of a chalk wash to a model painted with acrylics, then gloss-coated with Future floor wax (clear acrylic). Make sure that you are using chalk pastels, not oil pastels. Scrape some dust from the chalk onto a piece of foil or paper, using the back of a hobby knife blade. Pour the dust into a small mixing container. Add about twice as much in volume of water. Then add just drop of dishwashing liquid, and stir the mixture with a toothpick. Apply with a brush to the panel lines and other detail as shown below right. It will look messy now but the best is yet to come.


Let it dry for an hour or so, then start to remove the excess wash. Use the folded up corner of a paper towel, or Q-tips. Dampen these slightly, you don't want them wet. Now gently rub on the flat areas of the surface, and remove the excess chalk mixture, leaving some behind in the recessed detail.
If you wipe aggressively, you will remove all of the wash (which is fine if you want to start over on a given area). You can touch things up by adding more wash in any areas that need it.
The photos below show the bottom of the model, before (top) and after (bottom) applying the wash. Some of the finer details are now much more prominent.


When you are happy with the wash on your model, it should be sealed onto the surface with a light clear coat.
Send us your comments below! Login with your Facebook, Twitter, Google or Yahoo account.