
Decals and Markings
Applying decals and markings can be one of the most fun parts of building a plastic scale model. Since many airplanes of past eras had unique, colorful and personalized markings, the decals give the model its character. Most kits include a decal sheet with options to produce 2 or 3 different models, so your first task is to choose which one to model. Actually this really is your first task, before doing anything else: the different models may use slightly different kit parts, or have somewhat different paint schemes.Now if you're not happy with what's in the kit, or you have a favorite specific airplane that you want to model, you can purchase other decal sets, known as aftermarket decals. These are popular with experienced modelers. While not that expensive (e.g. $10 for a sheet for 1/48 WW2 airplane) they can cost as much as the airplane itself. The quality of these aftermarket decals is sometimes better than that supplied with the kit. A couple of reputable companies making aftermarket decals are Aeromaster and EagleStrike, although there are many others. You can search the catalog at www.squadron.com for exactly what you need.
Decals consist of paint layers on a plastic carrier film, with a paper backing. The decal has a glue that is activated by water. The basic application of the decal is covered in the kit's instructions:
- Cut out the decal from the sheet.
- Place in room temperature water using tweezers for 10 sec or so.
- Then remove and place on a paper towel for 30 sec or so. The water will penetrate the glue and cause it to come loose from the paper.
- Slide the decal into position on the model, and gently rub down to remove excess water or bubbles from underneath it.
You may have noticed that on some models, the decal looks as if it is painted on; on others it looks like a shiny sticker just stuck on the surface. To get that painted-on look, you'll need to move a bit beyond the basic instructions. Here are some advanced tips:
1) Decals work much better when applied onto a glossy surface. If the paint surface is flat (matt), then it is rough on a micro scale. When light passes through the clear part of the decal film and is reflected from the rough surface, it is scattered back in such a way as to make the clear film more visible and very obvious to the naked eye. This effect is known as silvering. To prevent silvering, apply a gloss coat to the model, let it dry 48 hours, then apply decals. A very popular gloss coat is Future acrylic floor wax (can be applied by brush or airbrush, no thinner). Other gloss coats can be used as well.
2) Remove excess carrier film from around the decal. E.g. if the marking is a letter "D", cut the clear film inside the "D" using a sharp (new) hobby knife blade. The excess film can be removed after applying the water. Removing this film also helps reduce silvering.
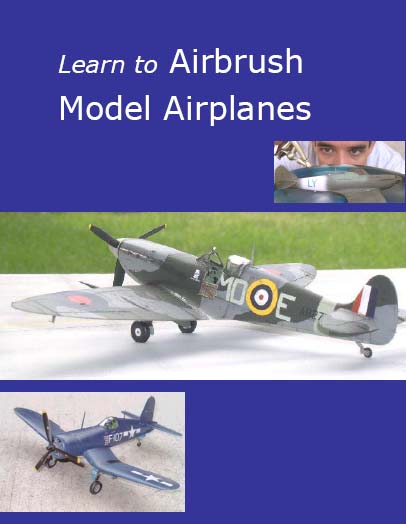
3) There are special products designed to help the decals go onto the surface better. Two popular ones are made by Microscale: these are Microset and Microsol. Microset is applied to the surface of the model with a brush, in the are where you are about to place the decal. Do this right after taking the decal out of the water. The Microset will help you to position the decal with less effort. After it is dry, apply Microsol. This has "plasticizers" which soften the decal film; the film initially wrinkles (but don't touch it!), then on its own settles down over every detail of the surface. See photo of the red, white and blue British marking below; that's not paint, it's a decal after 2 or 3 Microsol applications. It's remarkable to see it happen.


4) After all the decals are applied, let the model dry overnight. Then wash off the excess setting solutions by gently using soap and water on the model. We like to blow-dry it to prevent watermarks.
5) Now apply another gloss coat. This seals the decals, and helps reduce silvering even further.
6) Now apply any washes. These go best on a glossy surface, as it's easier to clean up the excess wash. Other weathering can also be applied at this time, although some (e.g. pastel stains) might work better on a flat (surface).
7) Not all airplanes are glossy. In fact, very few airplanes in military service are. So the final step will be a coat of flat clear paint. This can be mixed with glossy paint to give a semi-sheen finish if appropriate.
Send us your comments below! Login with your Facebook, Twitter, Google or Yahoo account.